Create (and edit) products using Bulk Editing Basic
You can create (and edit) many products at once with Bulk Editing by uploading the excel templates.
We recommend everyone to start creating products using the Basic template. The template contains everything you need to create beautiful product pages.
Step-by-step video guide on how to download, fill out and upload Bulk Editing Basic Template.
Download the Basic template
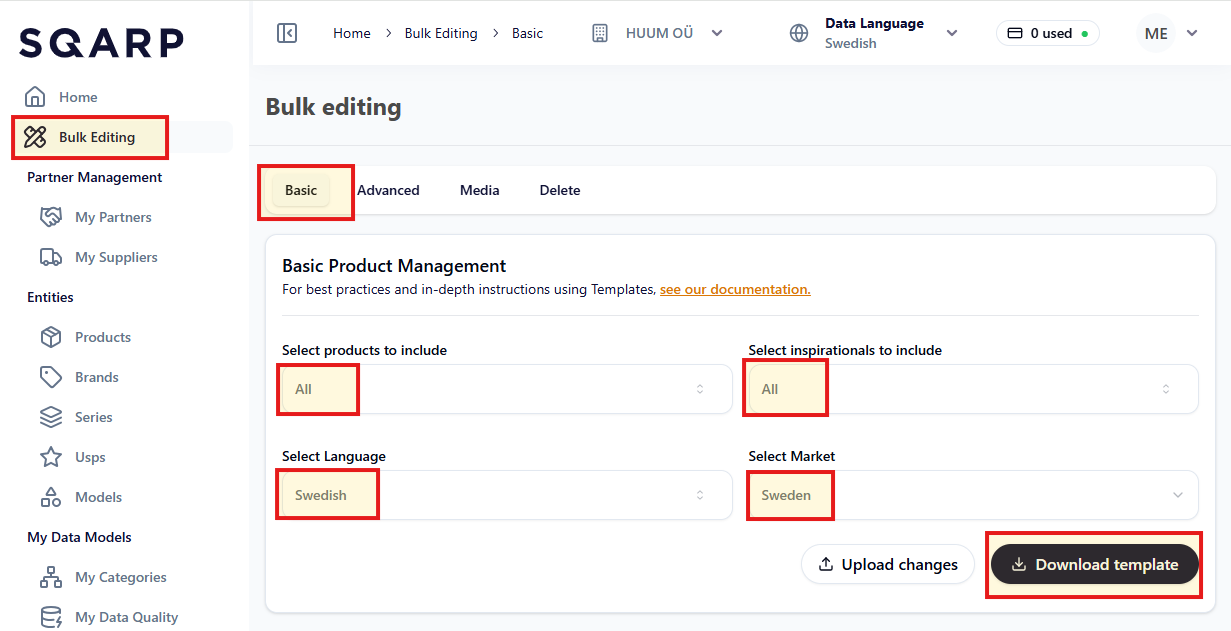
To download the basic template, login to app.sqarp.com and navigate to Bulk Editing in the side menu. On the Basic tab, you can decide what products and information to include in the template, what language your products should be created in, and for which market.
To include all existing products, include All product and All inspirationals.
Structure overview of Basic template
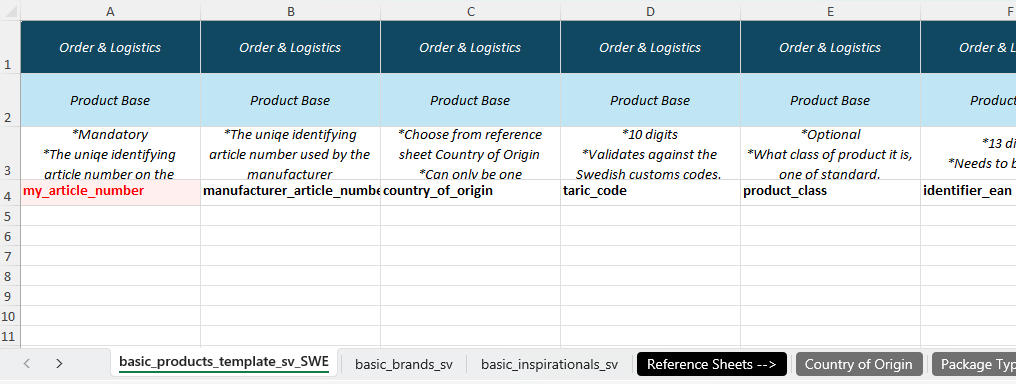
The Basic template contains several sheets. The first three sheets (basic_products_template, basic_brands and basic_inspirationals) is for you to fill out. Rows 1 and 2 contain guiding information to make it easier to see what kind of information you will be working with. Row 3 contains an explanation of the column. Row 4 contains the column header.
The remaining sheets are reference sheets that you can use to find available values for country of origin, packaging types, documents types, etc.
Fill out the Basic template
Fill out the Basic template with all the information you have available about your products.
Full step-by-step video guide on how to download and fill out the Bulk Editing Basic Template.
Order & Logistics
Product Base
Insert all base information about your products.
Column | Explaination |
|---|---|
my_article_number | Mandatory. |
manufacturer_article_number | The uniqe identifying article number used by the manufacturer. |
country_of_origin | Choose from reference sheet Country of Origin. |
taric_code | 10 digits. |
product_class | What class of product it is, one of standard, component, service, spare_part, bundle, accessory, made_to_order or other. |
identifier_ean | 13 digits. |
Primary Package
The primary package of a product is the inner most packaging, often the consumer-facing packaging.
If the primary package contains several parcels, expand the template and set [number] = 1, 2, 3, etc...
Column | Explaination |
|---|---|
packaging_type | Choose from reference sheet Package Types. |
packaging_material | Free text. |
gtin14 | GTIN14 of the primary package. |
package_weight_kg_[number] | Package weight in kg. |
package_volume_m3_[number] | Package volume in m3. |
package_height_mm_[number] | Package height in mm. |
package_width_mm_[number] | Package width in mm. |
package_depth_mm_[number] | Package depth in mm. |
Supplier
This part is market dependent. You can see in the sheets last three letters which market you are working with. For example, basic_products_template_sv_SWE indicates that we are working with supplier information for the Swedish market.
Column | Explaination |
|---|---|
supplier_product_title | The title of the product that you use in internal systems/lists. |
product_status | Mandatory |
partner_pricing_unit | What unit the product is prices for. |
partner_packaging_unit | What unit the product is delivered as. |
partner_pricing_multiple | Number. |
minimum_order_quantity | If 5, a customer can't buy 1-4. The customer can by 5 or more (including 6,7,8,9) |
max_delivery_time_business_days | Single value. |
recommended_price_value | Your recommended selling price to end customer. |
recommended_price_currency | Currency for recommended_price_value. |
recommended_price_unit | Choose from reference sheet Product Units. |
recommended_price_multiple | Number. |
Inspirationals
Brands
To create a new Brand, choose the sheet “basic_brands_xx” (where xx will be your chosen language type, i.e “en”) and enrich your brand(s) with content. Each row represents one unique brand, several brands can be added in this sheet. In the sheet basic_brands_xx you can also add descriptions-material and other media connected to your brand(s).
Column | Explaination |
|---|---|
brand_name_slug | Mandatory |
brand_name | Mandatory |
brand_logo_url | URL to logo |
Series and USPs
To create a new Series or a USP, open the sheet "basic_inspirationals_xx" (where xx will be your chosen language type, i.e "en") and enrich your series and/or USPs with content.
Each row represents one unique series or USP. You can add multiple series/USPs in this sheet.
Column | Explaination |
|---|---|
inspirational_slug | Mandatory. |
inspirational_name | Mandatory. |
inspirational_type | Mandatory. |
brand_name_slug | Mandatory. |
Connect product to Brand / Series / USPs
To connect a product to a Brand, Series and/or USPs go to the sheet basic_product_template -> Inspirationals and fill out brand_name_slug, series_1 and/or usp_1.
To connect a product to several series or USPs, expand the template and set [number] = 1, 2, 3, etc...
Column | Explaination |
|---|---|
brand_name_slug | Mandatory. |
series_[number] | Choose existing inspirational_slug from sheet basic_inspirationals. |
usp_[number] | Choose existing inspirational_slug from sheet basic_inspirationals. |
Variant Management
The goal is to create a variant management structure across the entire assortment with main articles (virtual) and selectable attributes to help customers navigate the assortment.
This means all variants of a product are gathered on a single product page, allowing the customer to navigate and choose between the different variants directly on this page.
Example: If a shirt is available in several colors and sizes, all these options will be displayed on the same page, and the customer should easily be able to choose their preferred color and size.
The virtual_reference decides what products that should be located on the same product page (virtual).
The title of the product page (virtual) is created by the product_type, virtual_name and brand_name. Therefore all products with the same virtual_reference also needs to have the same product_type and virtual_name.
If several products have the same virtual_reference, end customer needs to be able to navigate between them. That is done by creating selectable keys and selectable values.
To add several selectable key/value, expand the template and set [number] = 1, 2, 3, etc...
Column | Explaination |
|---|---|
virtual_reference | Mandatory. |
product_type | Mandatory. |
virtual_name | [product_type] + [brand_name] + [virtual_name] create the title of the product page (virtual). |
selectable_key_[number] | The selectable key (question) the customer needs to answer. |
selectable_value_[number] | The selectable value (answer) the customer needs to answer. |
Relations
List all accessories and spare parts that are relevant for each product.
To add several accessories or spare parts, expand the template and set [number] = 1, 2, 3, etc...
Column | Explaination |
|---|---|
accessory_[number] | The article_number of a product that should be presented together with the product in column A (as suggested accessory) |
spare_part_[number] | The article_number of a product that is a spare part of the product in column A. |
Descriptions & Attributes
Product Descriptions
A description block consists of a header, a description and bullets. Do not include HTML-markups or other text formatting.
To add several description blocks, expand the template and set [number] = 1, 2, 3, etc...
Column | Explaination |
|---|---|
description_header_[number] | Free text |
description_[number] | Free text |
description_bullets_[number] | Free text |
Attributes
Add the attributes relevant for your products. You can expand the template as much as you require. You can work with table headers on row 3. The key for each attributes you write on row 4. The value for each product should be on respective row.
If a product has no value for a key, leave the corresponding cell empty.

Media
Product Images
Insert the URL to your product image.
If you have several images, expand the template and set [number] = 1, 2, 3, etc...
Column | Explaination |
|---|---|
image_url_[number] | URL to one image |
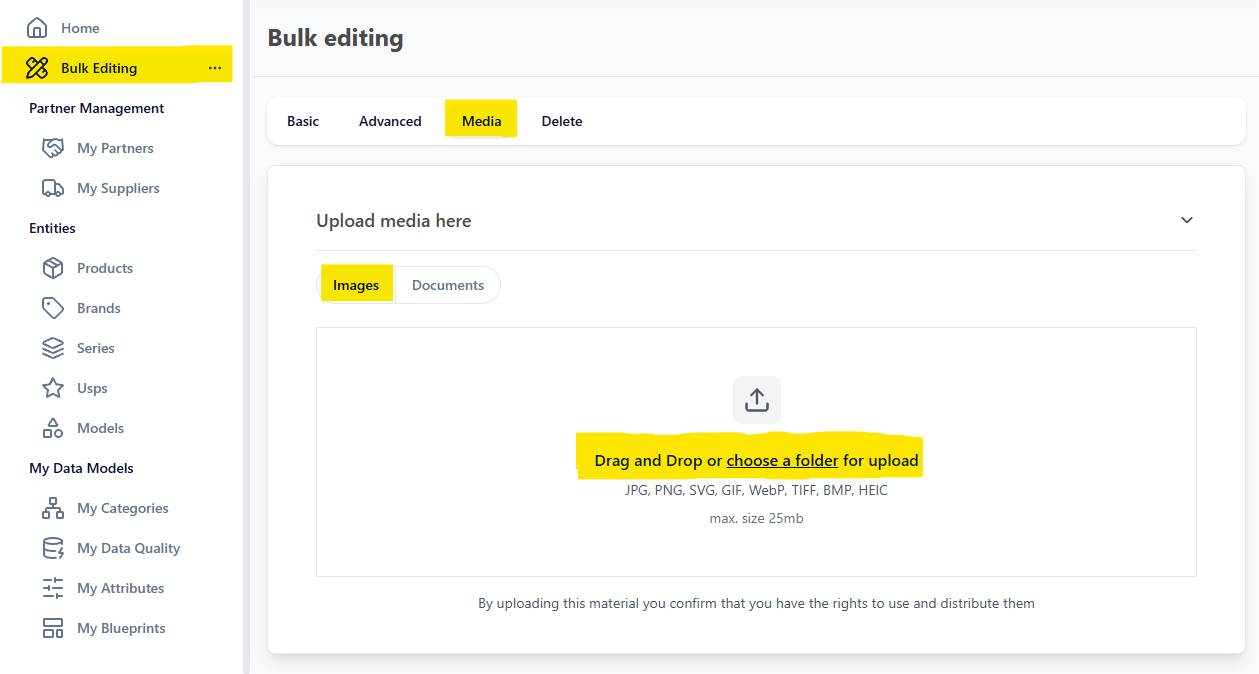
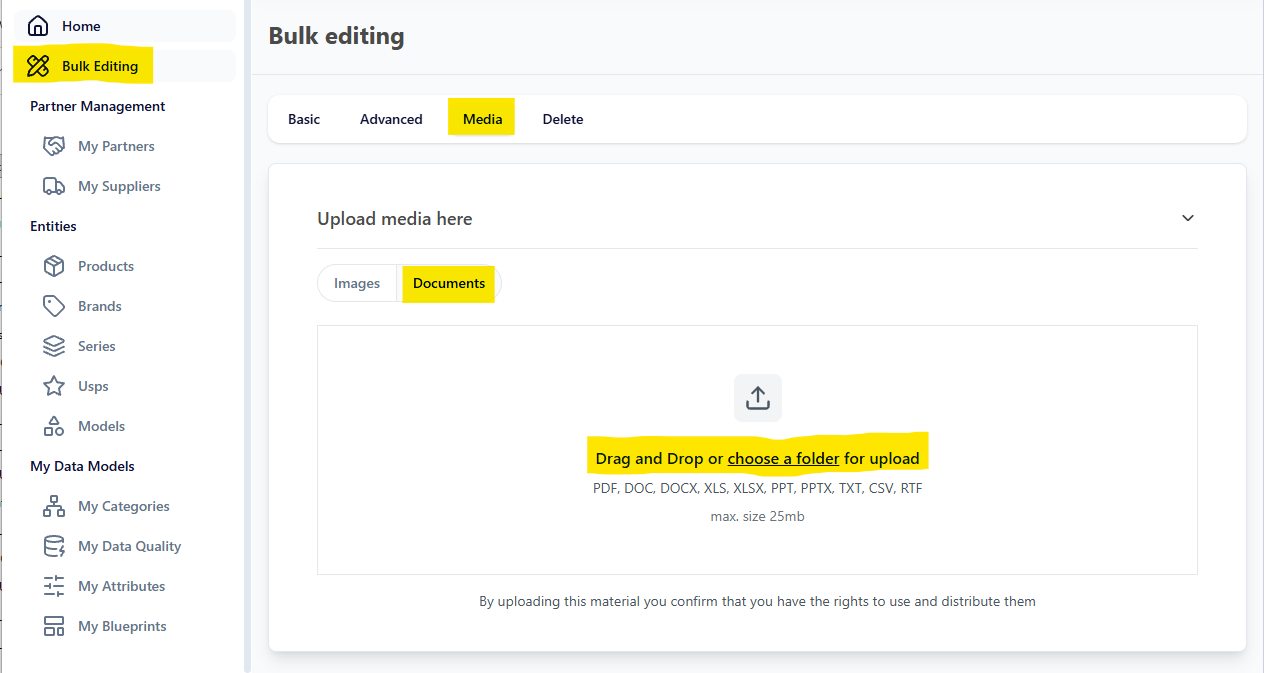
You can create links from image files. Go to app.sqarp.com, and navigate to Bulk Editing in the side menu and go to the Media page. Choose Images, and upload your folder of images. After clicking Generate URLs, you will be able to download an excel file. The excel-file will contain the URL for you to use, together with the file name and folder path so you know which link and image that goes together.
Product Documents
Insert the URL to your product documents. You can tag your documents with type and languege(s).
If you have several documents, expand the template and set [number] = 1, 2, 3, etc...
Column | Explaination |
|---|---|
document_url_[number] | URL to one document |
document_type_[number] | Choose from reference sheet Document Types |
document_language_codes_[number] | If several languages, separate with "|". |
You can create links from document files. Go to app.sqarp.com, and navigate to Bulk Editing in the side menu and go to the Media page. Choose Documents, and upload your folder of images. After clicking Generate URLs, you will be able to download an excel file. The excel-file will contain the URL for you to use, together with the file name and folder path so you know which link and image that goes together.
Product Videos
Insert the URL to product video. Use YouTube links to ensure best usage. You can tag your videos with type and languege(s).
If you have several videos, expand the template and set [number] = 1, 2, 3, etc...
Column | Explaination |
|---|---|
video_url_[number] | URL to one video |
video_type_[number] | Choose from reference sheet Video Types |
video_language_codes_[number] | If several languages, separate with "|". |
Upload the Basic template
To upload the basic template, login to app.sqarp.com and navigate to Bulk Editing in the side menu.
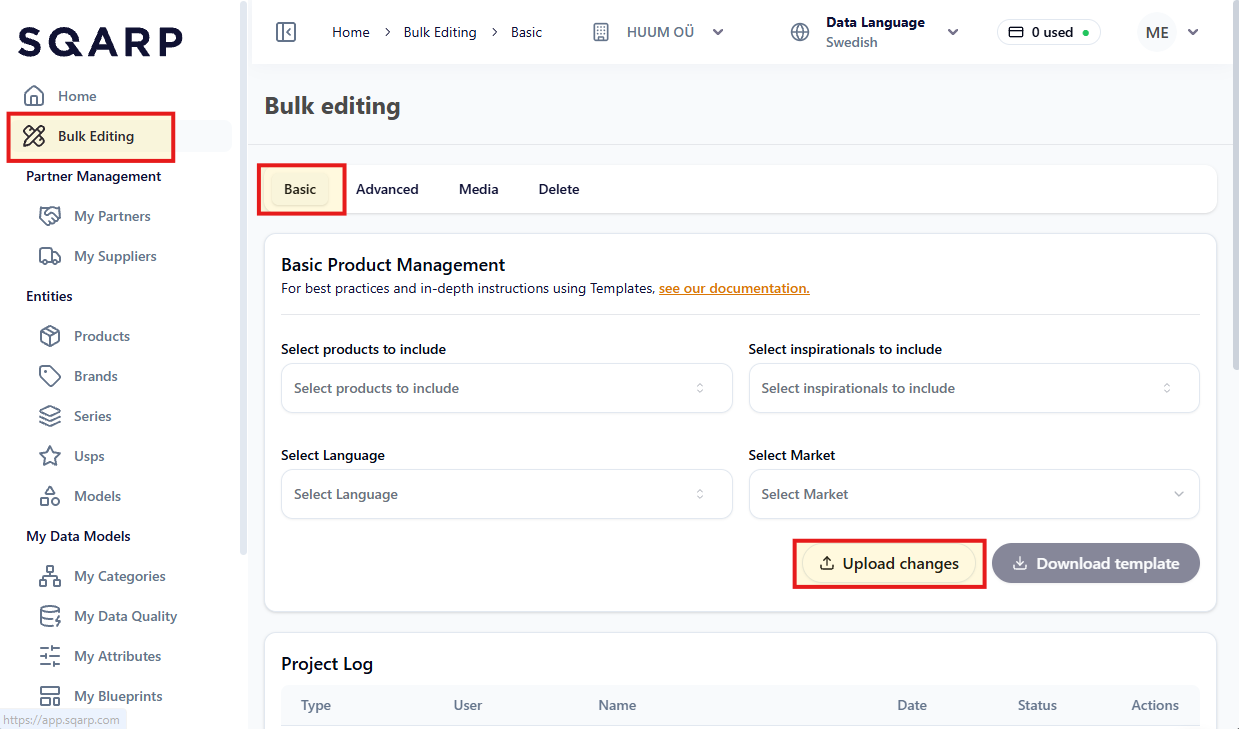
On the Basic tab, click Upload changes. In the modal that opens up, select the Basic template and give your upload a Project Name. Click Create Project.
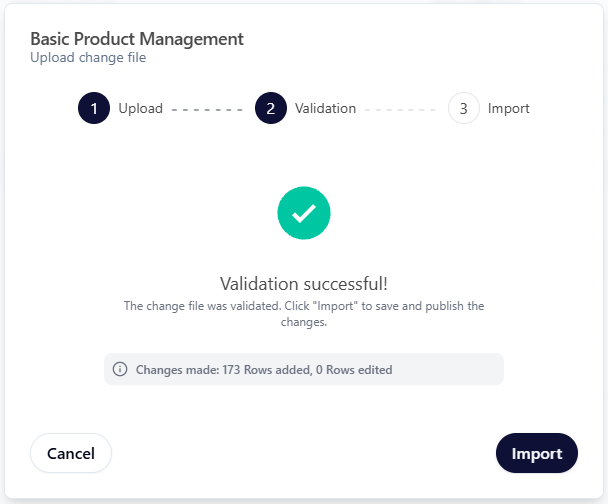
Validation and import
Your uplaoded file will now go through a validation.
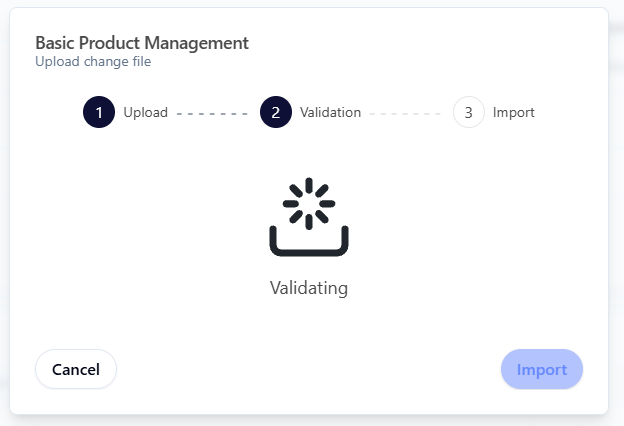
The validation can take a few seconds, up to a few minutes. You can close down the modal, and find your upload in the Project Log.

If you receive a Validation failed, you can see the errors and download the error log. Complement your file, or correct your information, and re-validate your file.
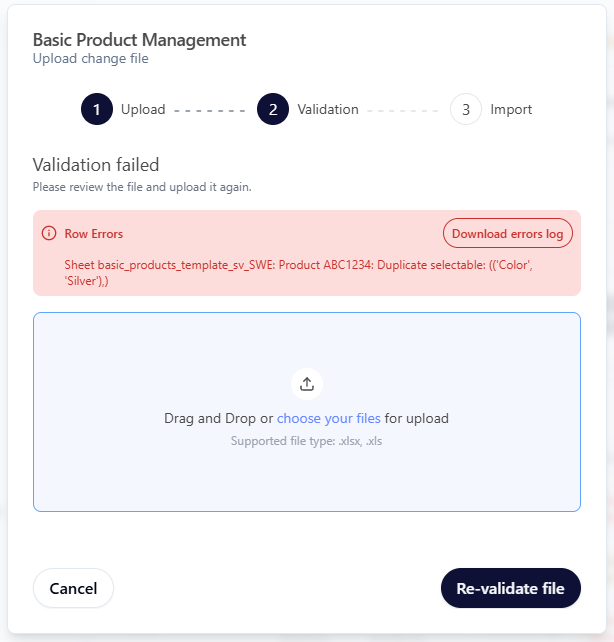
When the validation has been successful, click Import.