Share Products to Partners
When you have added your products to SQARP, you can share them to your partners using the Partner Management feature.
Step-by-step video guide on how to share products to your partner
Set up partnership
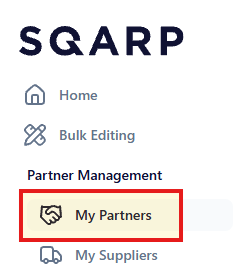
You can create new partnerships, or accept partnership requests, by clicking on My Partners in the side menu. Partnerships can be set up to organisations who are actively using SQARP, as well as organisations not using SQARP.
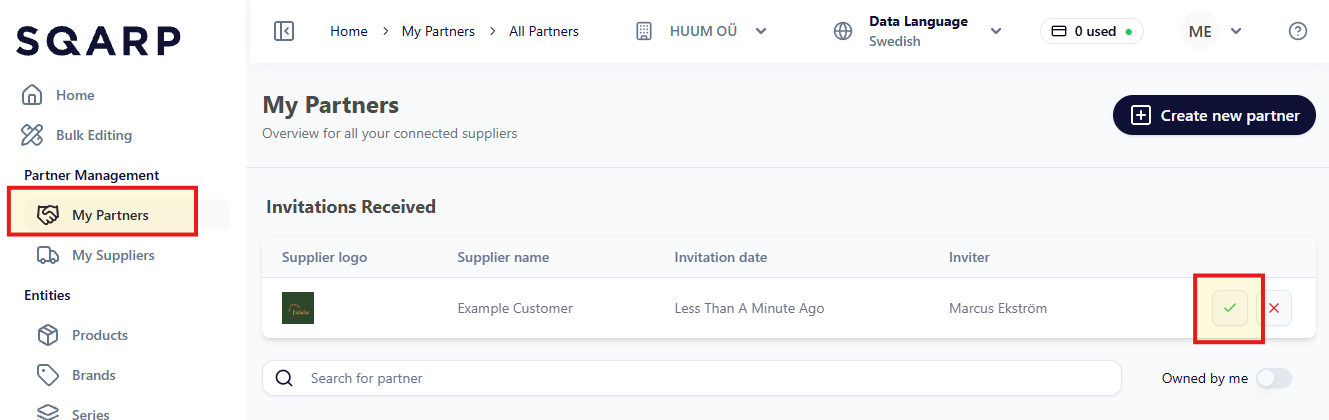
Accept a partnership request
If your partner is using SQARP they might have sent you a Partnership request. The partnership then already comes pre-configured and is for you to accept or decline.
By pressing the green checkmark you will be accepting the partnership. No information will be shared in this step.
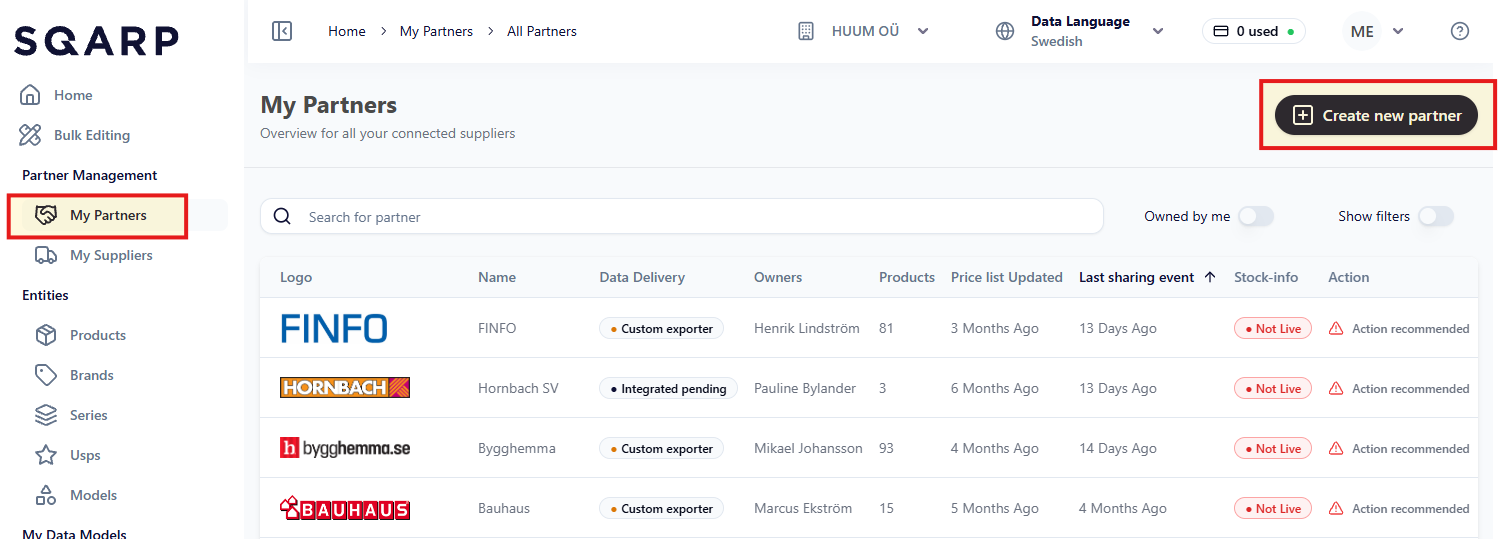
Configure a new partnership
To configure a new partnership, go to My Partners in the side menu and click on Create new partnership.
Basic information
Enter the name of the partner organisation. It will be the name that is shown in your list of partners. You can set an internal owner of the organisation. The Market will dictate what delivery times and other market specific information that will be shared. The currency will be the currency used to communicate the partners purchase prices.
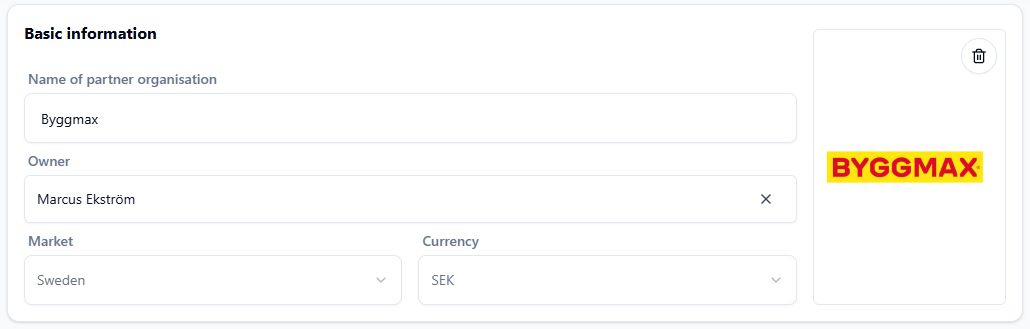
Partner information
You can leave the partner information empty, or you can insert your contact person's information to keep it over time.

Benchmarking Price List
Under Benchmarking Price List, press Skip this step for now.

Partner Pricing
Under Partner pricing, press Skip this step for now.

Custom Delivery Method
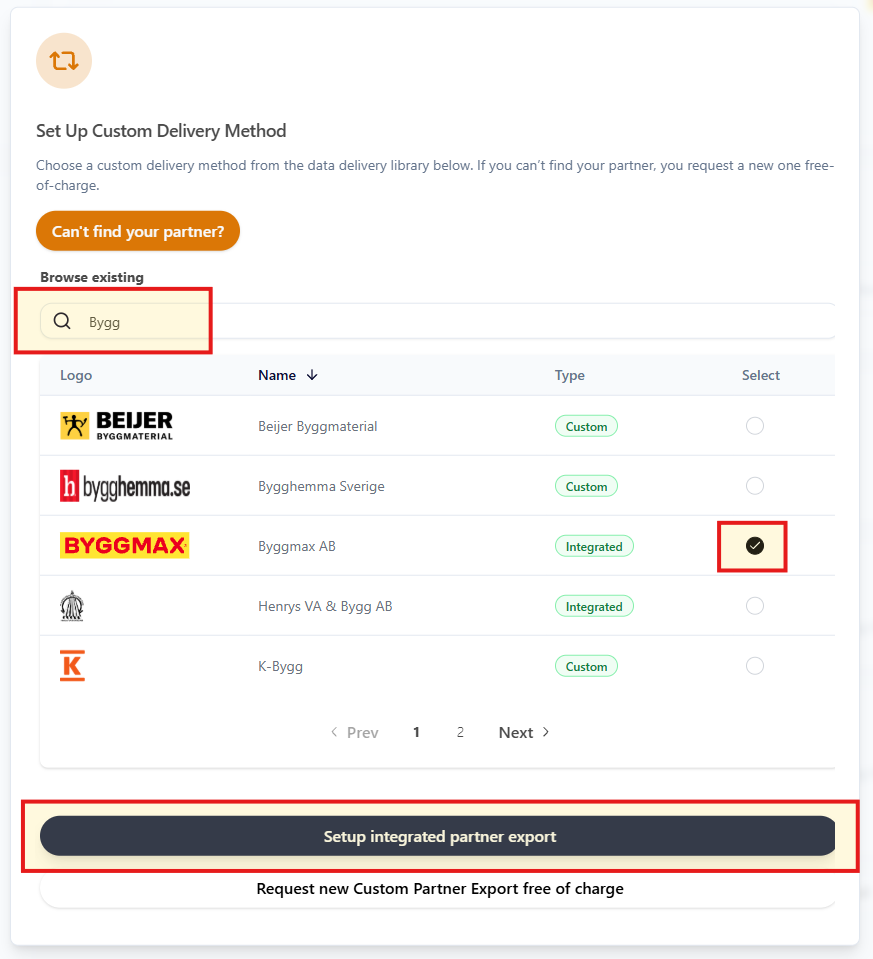
Under Custom Delivery Method press Configure Custom Delivery Method.

Search for your partner using the search bar or browse through the library of available Delivery Methods. Select your partners in the list, and press Setup integrated partner export.
Add products to pricelist
In this step you add the products you want to share with your partner, You can also set your partner prices in your chosen currency (excl. VAT).
Possible to add products to your partner's price list in two ways. Either through uploading an excel template (alternative A), or selecting the products directly in the platform (alternative B).
Alternative A: Download & upload pricelist template
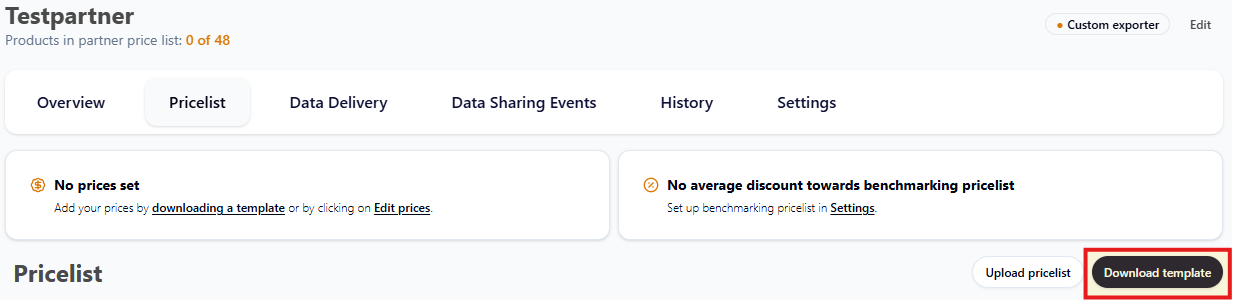
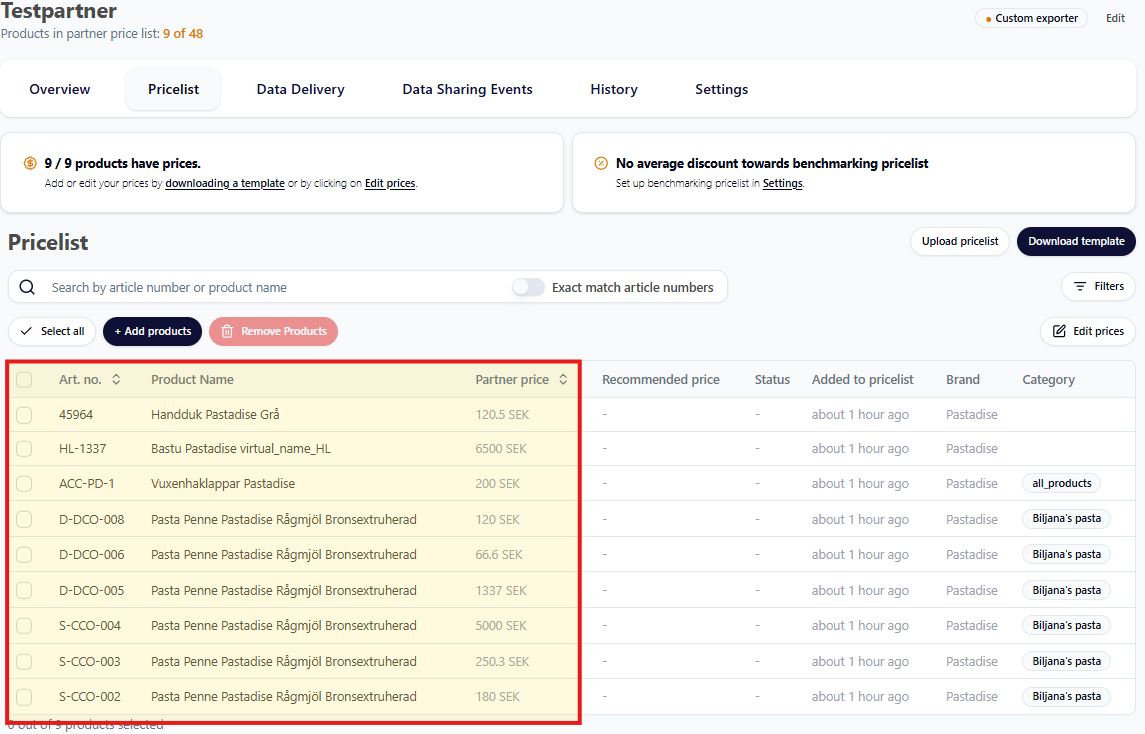
In the pricelist view you can press "Download template" to download a template with all your products. In this template, you can set your partner prices.
For all products that should be active in your partner's pricelist, mark these as TRUE in column G ('In pricelist'). If you want to communicate your partner's price, add it un column C.
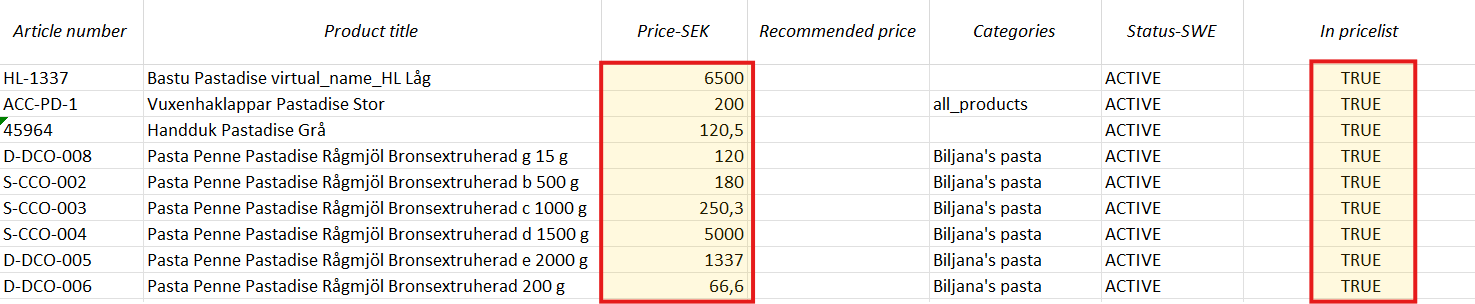
Save the pricelist and upload it by pressing Upload pricelist next to the Download template-button. You can now see the added products with their respective partner prices in the UI.
Alternative B: Add products manually
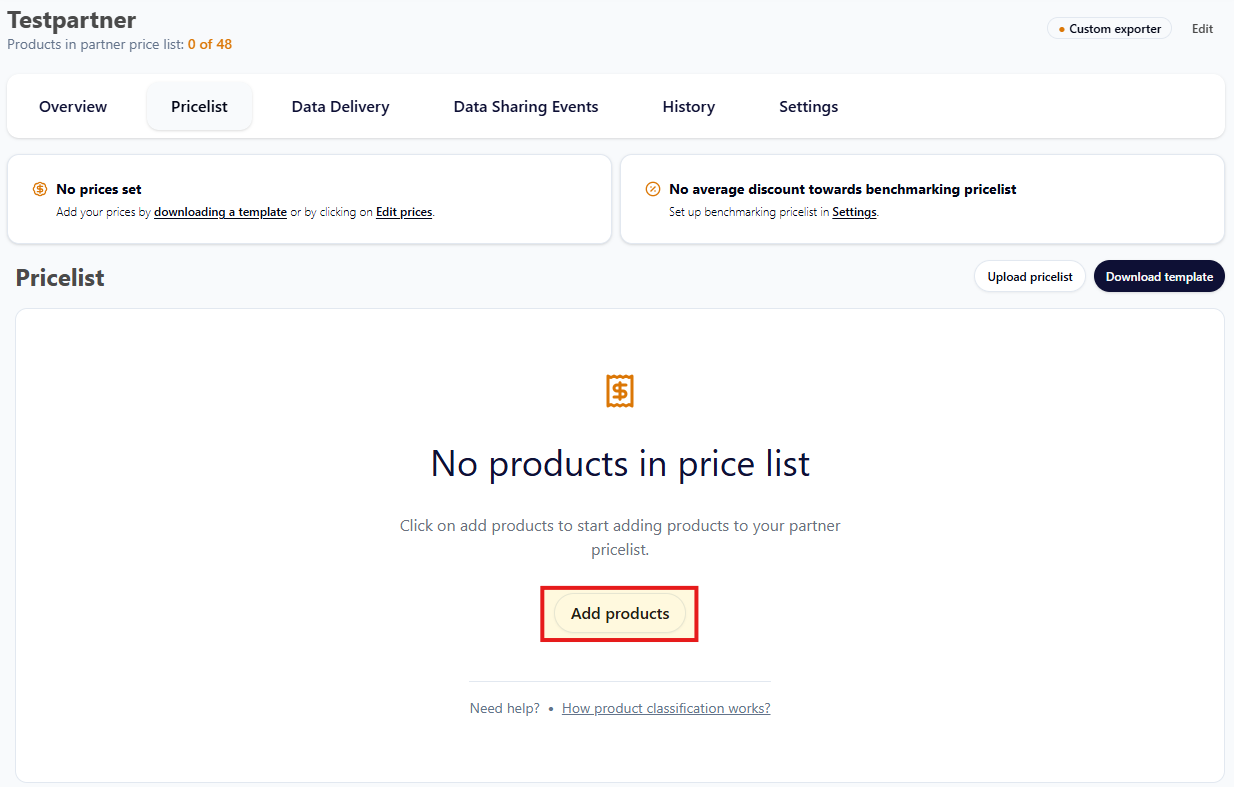
A quick way to add fewer products is to simply press Add products.
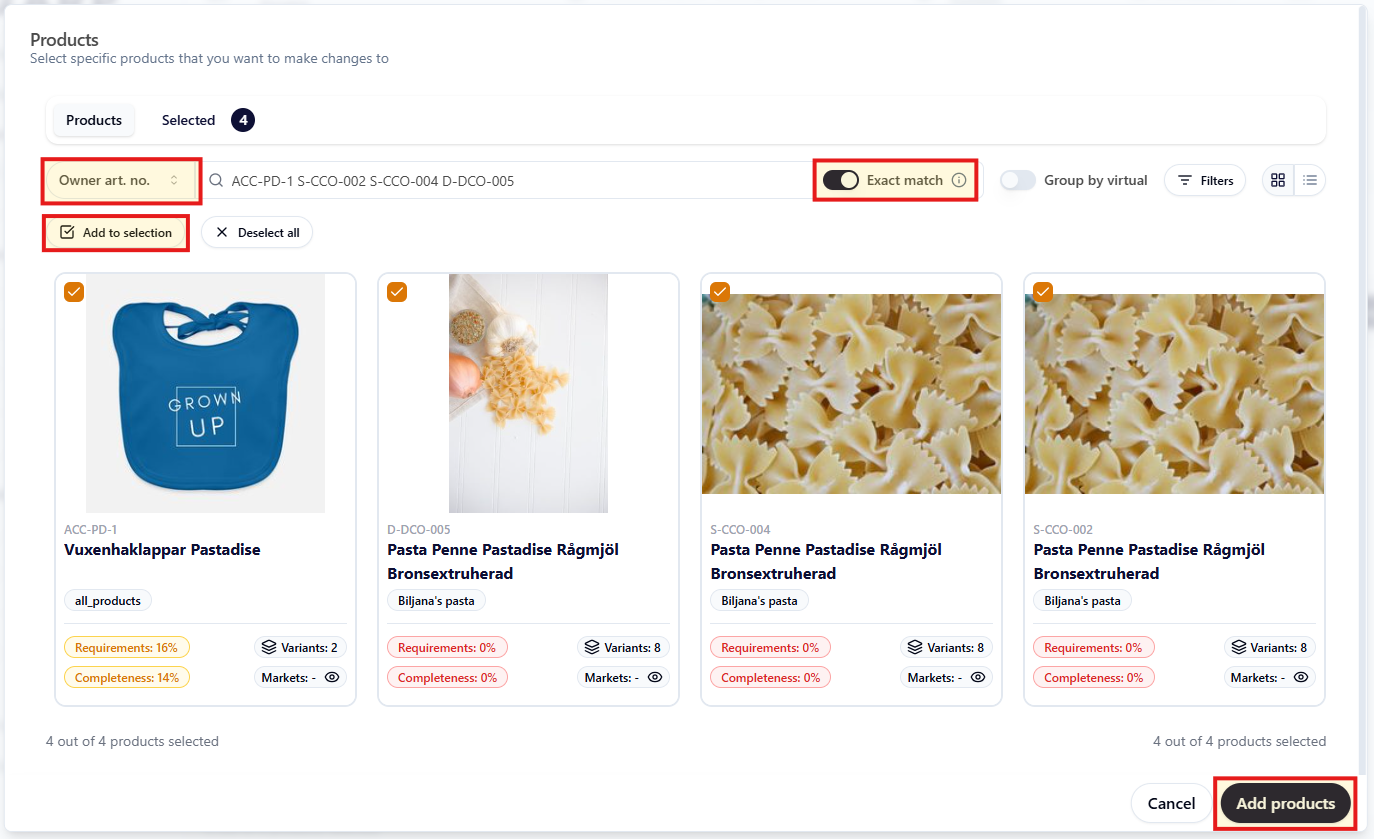
In the window that opens you can search for keywords, article numbers or virtual references. If you want to add a specific set of article numbers, choose Owner article number to the left of the search bar, toggle Exact match and simply copy and paste your array of article numbers. Click Add to selection, and Add products.
The products are now added to the pricelist! You can set partner prices manually in the UI, or download the pricelist template (see Alternative A) to add several prices in bulk.
Classify- and Review Partner Requirements
Classify Partner Requirements
In this step you classify your products to fit your partner's mandatory requirements.
- Go to the Data Delivery tab.
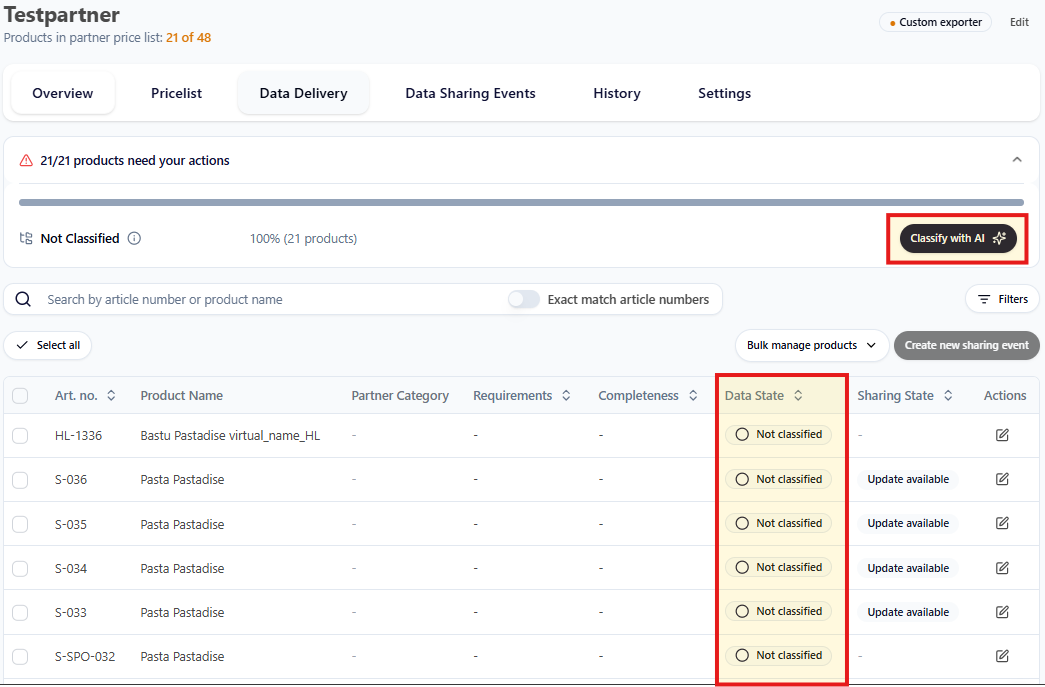
- The system will show the Data State for each product as Not classified since products are yet to be classified towards your partner's requirements.
- Select Classify with AI to automatically 1) assign each product to a partner's category, and 2) classify the partner's attributes for each product based on the available data you have added to SQARP.
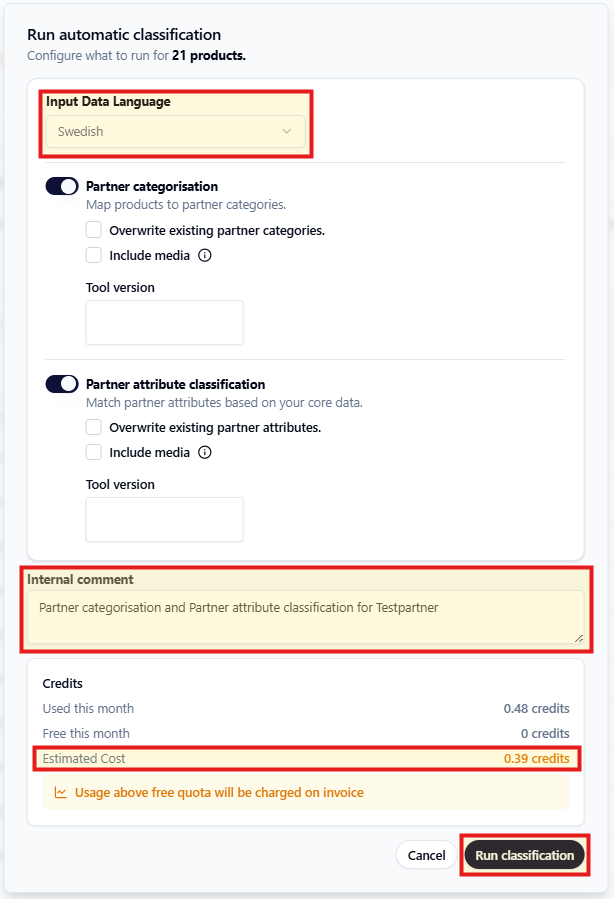
In the classification window, choose your Input Data Language. If you want, you can write an Internal comment so you can keep track on the classification job.
You will receive an Estimated Cost on how many credits the job will cost. Run classification.
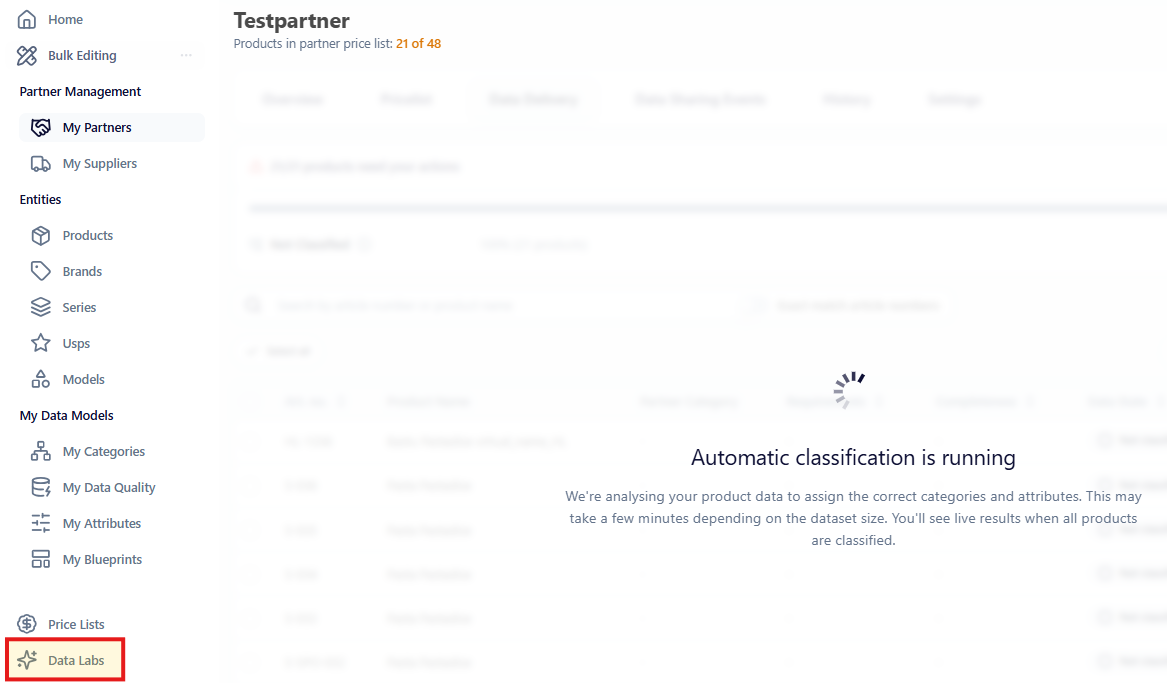
The classification will now run. You can leave the page and continue your work elsewhere in the platform. If you want to check in on the status of the classification, go to the Data Labs tab.
Review & Supplement Partner Requirements
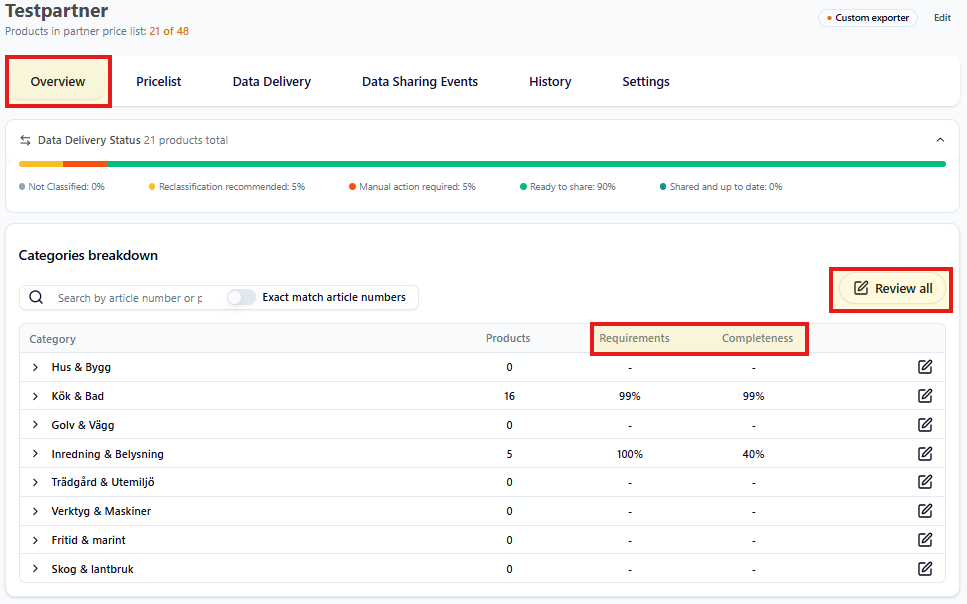
- Go to Overview to review results. Each product in the partnership will be in Data State Ready to share or Manual Action Required. All products should be in state Ready to share when finishing the review.
- Categories Breakdown shows how products were categorized into partners category structure. For each category, Requirements show the share mandatory data classified while Completeness show the share of all requested data classified.
- Select Review all or review a specific category to see what specific information is missing and review the values the AI has assigned to the different attributes.
If mandatory data is missing, you want to add additional data, or if the AI has made a mistake – it’s now time to supplement data.
Data can be supplemented by updating the Base Data or by updating the Partner Data directly. In most cases – we recommend you supplement your Base Data.
Base Data is supplemented using the standard editing features. Partner Data can be edited directly in the UI or under Bulk Editing > Advanced > Partner Data.
If you have supplemented your Base Data, the supplemented products will get Data State Reclassification recommended (under the Data Delivery tab). Run Classify with AI again so that your supplemented data is considered in the results. (This step is not necessary if you supplemented Partner Data directly).
Share Products with Partner
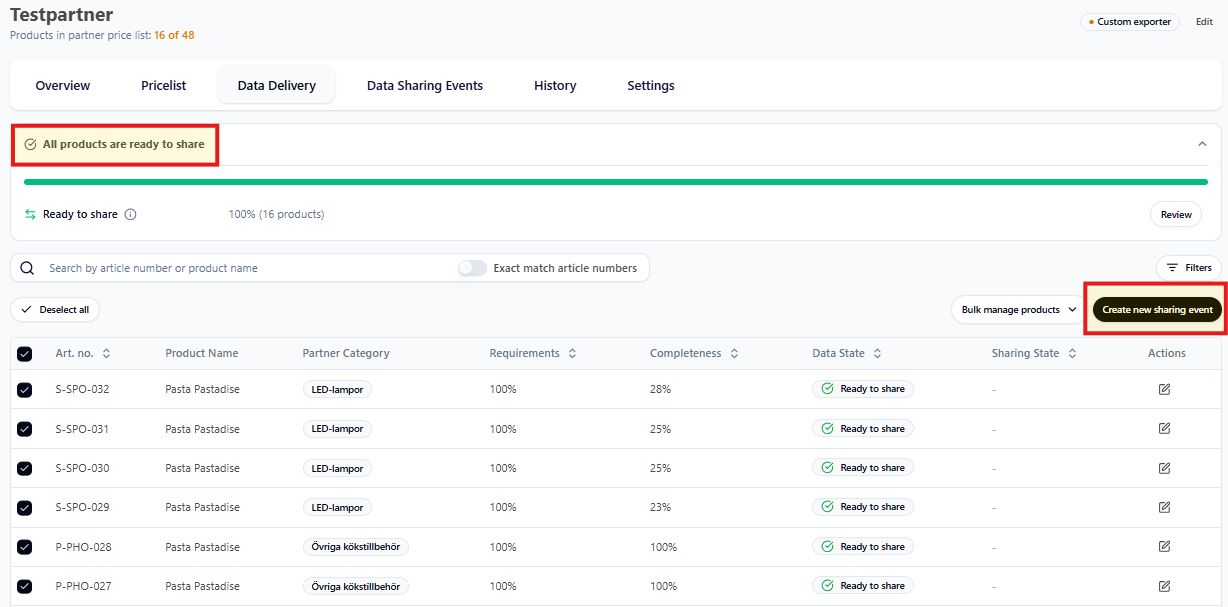
Once all Partner Requirements are met with 100% for the scope of products you want to share with your partner, it's time to create a Sharing Event.
- Go to Data Delivery
- Select the products you want to share
- Create a Sharing Event.
- If the Delivery Method is checked as Integrated, create your sharing event - and you're done! Your products have now been shared with your partner.
- If the Delivery Method is checked as Custom Partner Export, create your sharing event and download the pre-filled partner template under Data Sharing Events (not necessary for integrated partners).
- Send files with product data to partner (not necessary for integrated partners).